Quickstart
This quickstart runs a RoIS engine with simulated components and connects the OpenRoIS HRI Client, a browser-based inspector, to it. No robot is required.
You will need Node.js 22 or later and Git.
1. Get the Source
git clone https://github.com/openrois/openrois.git
cd openrois
2. Build the TypeScript Types and SDK
The HRI Client depends on the generated RoIS types and on the TypeScript SDK, which are built from source during the alpha.
(cd interfaces/typescript && npm install && npm run build)
(cd sdk/typescript && npm install && npm run build)
3. Start an Engine
The mock engine is a RoIS engine test double. It exposes three simulated components
(PersonDetection, Navigation, and SystemInformation) on ws://127.0.0.1:8765.
cd examples/mock-engine
npm install
npm start
4. Open the Inspector
In a second terminal, start the HRI Client:
cd examples/hri-client
npm install
npm run dev
Open http://localhost:5173 and click Connect. The client calls
rois.system.get_profile, then renders one panel per component with its queries,
commands, and events.
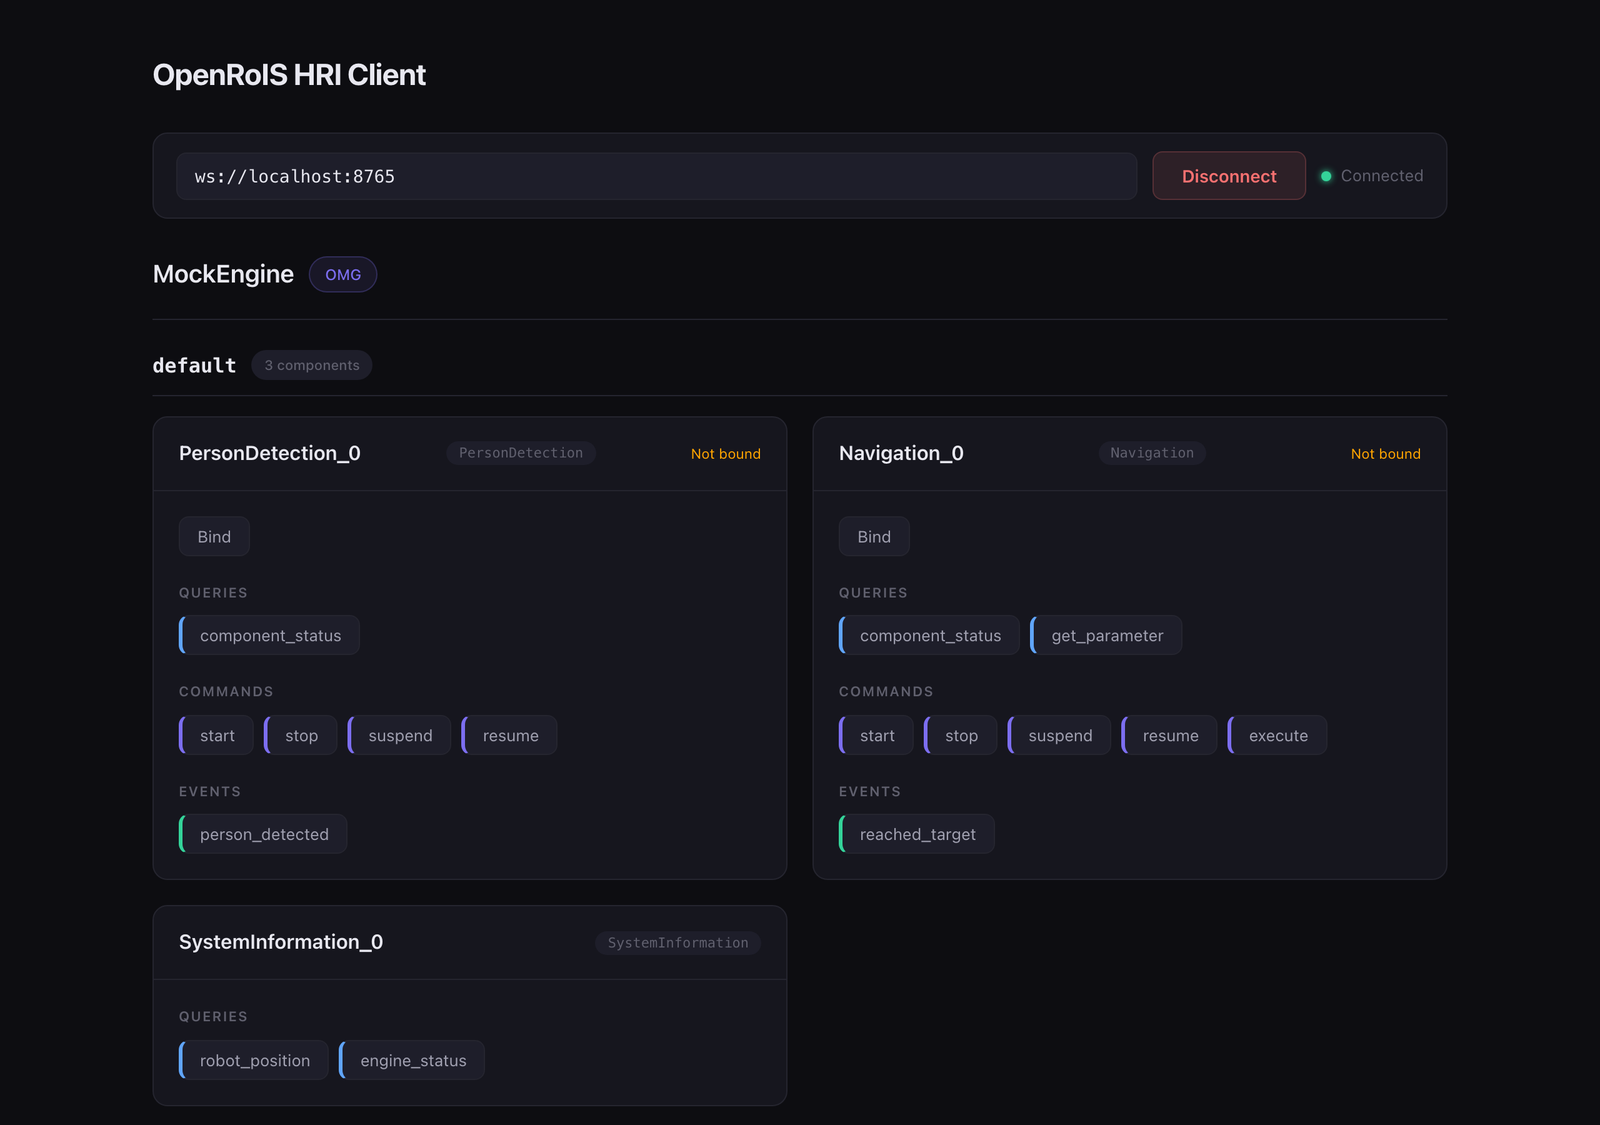
Try binding the Navigation component, running a component_status query, or
subscribing to reached_target. Every action is a JSON-RPC 2.0 call that you can watch
in the browser's network inspector.
What Just Happened
- The engine published an HRI Engine profile describing its components.
- The client discovered the components at runtime instead of hardcoding them. This is what lets one RoIS application work with any robot behind the gateway.
- Commands followed the RoIS reservation lifecycle:
bind, thenexecute, thenrelease.
Next Steps
- Read how the pieces fit together in the architecture.
- Write your own service application with the TypeScript SDK.
- Connect a real platform by writing a component and adapter.